
What is Revit Architecture and its advantages?

Table of Contents
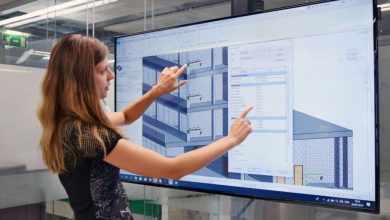
1) What is Revit Architecture?
Revit Architecture is a software that provides dynamic information in intelligent models. It also allows you to accurately design complex structures and document them efficiently. Each intelligent model created with Revit Architecture is an entire project and stored in a single database file.
2) What are the advantages of using Revit Architecture?
Revit Architecture is normally used in architecture design and building models. The BIM workflow offered by Revit architecture not only maximizes productivity, but also optimizes design and documentation workflows. It speeds up project progress from design to completion, automating updates on the model with a single design change.
3) What are the files used in Revit Architecture?
The files used by Revit Architecture are:
- RVT: Revit Project Files
- RFA: Revit family file
- RTE: Revit model file
- RFT: Revit family model file
4) How do I use layers in Revit Architecture?
The default template will appear on the startup page when you create a new metric project. Then, a dialogue box will appear for you to choose a “DefaultMetric.rte” template. There are a few default levels in Revit: add another level, rename the level, and open the north view
To add a level higher than the default one, go to the main menu and activate the level from the ribbon inside the Reference section. To insert a new layer, you can draw or choose lines.
5) How do I copy Revit Project settings to other projects?
In order to transfer a Revit project, use the Transfer Project Standard tool.
- First activate this tool by going to the Manage tab -> Settings Panel -> Transfer Project Standard. Next, choose your source project and settings. By default, a dialogue box will open. You can select and deselect the option based on the requirements. If duplicate copies are present, Revit will ask whether to ignore the duplicate copies or only select a new copy. Choose “Overwrite” if you want Revit to overwrite the current one. In the same way, it will show other options, such as saving the list of conflicts and eliminating unnecessary duplicate types.
6) How do I create a plan in Revit Architecture?
To create a plan, you have to use “Sketch.” To do this, follow the steps below.
- Open your file and open the 1st floor view. Activate the floor tool option from the ribbon in the Home tab.
- Now you will see your floor become semi-modified, which means you can only view it and use it as a reference for your floor sketch. When drawing, you will have to define the boundary.
You can see the sketch tools like rectangle, circle, lines and then you can create the floor and the other level too.
7) How do I add structural columns in Revit Architecture?
To add structural columns in Revit Architecture, you need to position the columns at specific grid intersections.
- First, double-click on level 1 in the project browser.
- On the Home tab, click the drop-down bar for the column and select the structural column.
- For the type of column, choose the concrete-regular column of 300X450mm.
- Place the A1 column, making sure that the grid lines are purple during placement.
- Lastly, it will confirm that the column is in the center of the two lines of the grid
8) How do I create a floor edge slab and custom component in Revit Architecture?
To create a floor edge slab:
- Select New -> Family -> Find metric profile hosted.rfa and use it as a model
- Now from the Revit menu, select new -> Once finished with this profile, save it.
Next, open the project that was created and upload project profile. Now go to “Define an edge of the attic.” Open the floor plan, then activate the floor slab edge tool. From the Contextual tab, click Element Properties -> Type Properties. Click the duplicate button and give it a name and then click OK.
Notice the edges of the floor in a vacuum. You will see that the edges of the slab are added now.
9) How do I edit Revit Mass in X-ray mode?
To edit Revit Mass in X-ray mode, simply open the Revit family of masses and click on the mass to select it. A contextual tab will open. Now click on the Revit ribbon to activate X-ray mode. Now you can see the Revit mass as a transparent image with clear mass secondary objects. The points are bigger and you can see through the mass.
To add a profile: in the Revit ribbon you will see an “Add profile” option. Click “Add Profile” to activate it. Now move the pointer over the mass and preview your profile before adding it. Once you think the profiler is in the right place, you can click to confirm. You can optimize the mass by dragging the points, edges and surface.